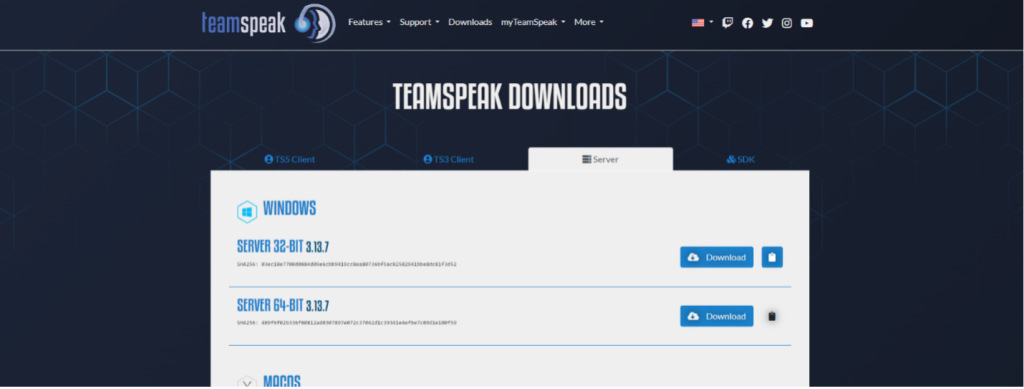
2) Download TeamSpeak3 Server software for Windows. Check your windows version to ensure that you are downloading the server according to your device specification.
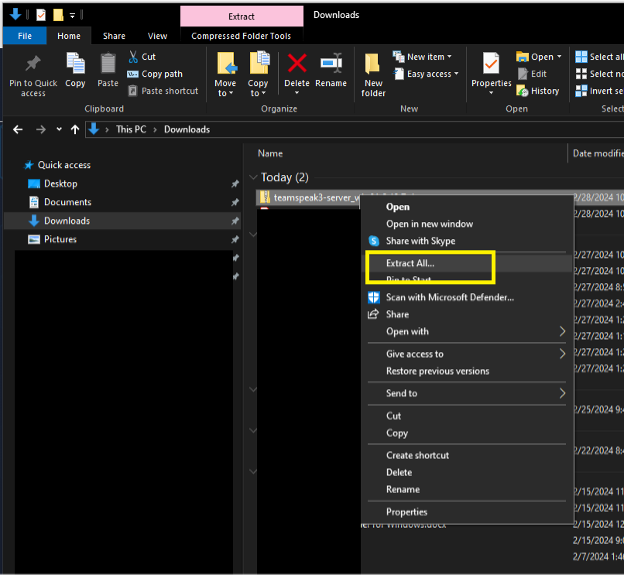
3) When download is done, extract the files to a directory.
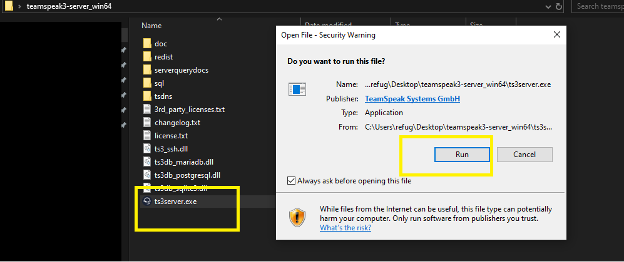
4) Run the exe file. Double click it from the directory and click Run
5) Accept the General Business Terms and customer information.
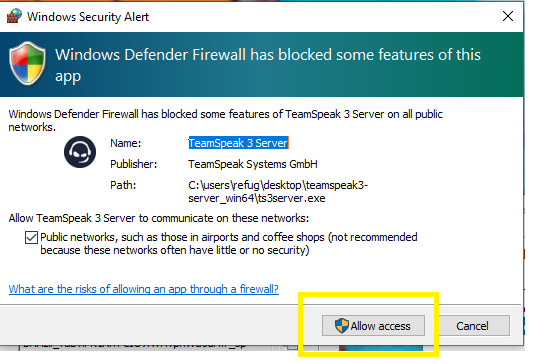
6) Click allow access from the Windows Security Alert page
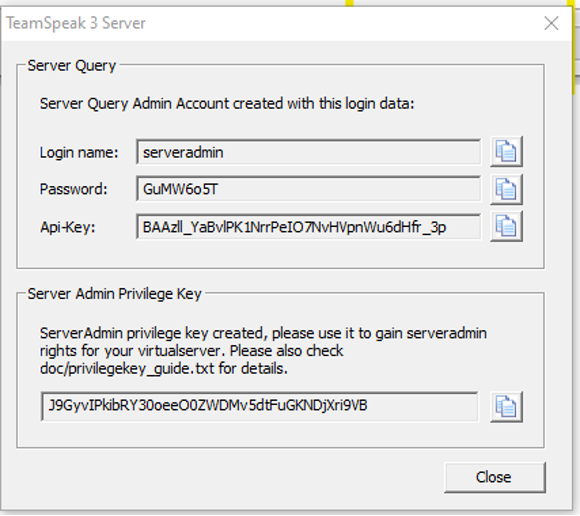
7) The screen with your server login credentials and Server Admin Token will be displayed. Make sure to copy the fields as these will be used in the process
8) You’ll see the TeamSpeak3 server icon on your taskbar. It means that the server is now running.
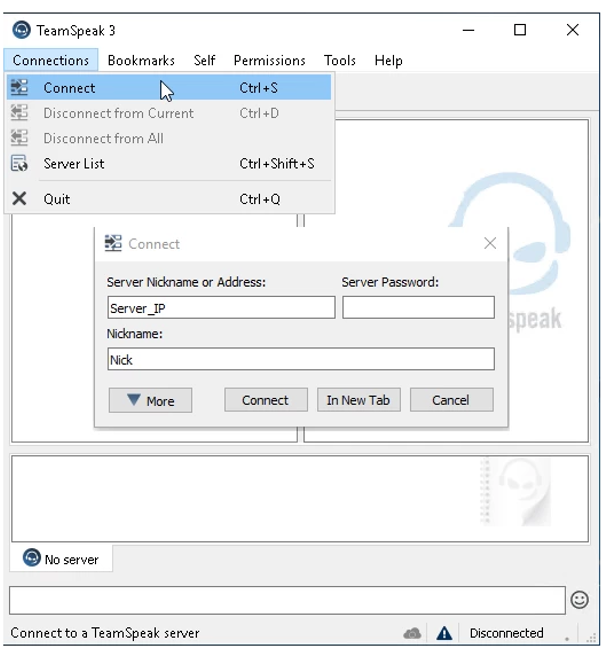
10) Connect to the server through your TeamSpeak client as the admin. If you haven’t downloaded the TeamSpeak Client yet, go back to the TeamSpeak website downloads page and choose the TeamSpeak Client according to your device specification (32-bit or 64-bit).
11) After connecting successfully to TeamSpeak server as an admin, insert the Server Admin Privilege key that you’ve copied as per the instruction in #7.