How to use the Node Package Manager (NPM) on Windows
March 25, 2024
By
maribh
Learn how to use Node Package Manager (NPM) on Windows with ease. Follow these step-by-step steps to install Node.js, check the NPM installation, create a Node.js project, install and manage packages, and optimize your workflow using custom NPM scripts.
Install NPM on Windows
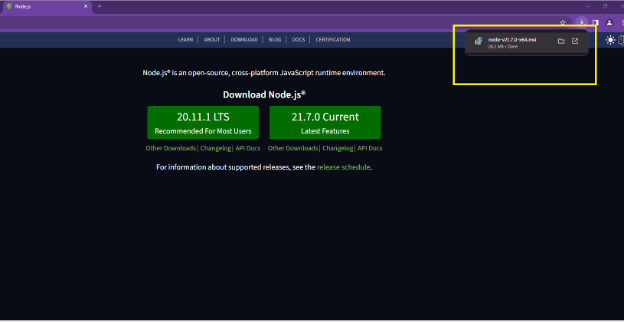
Download the Node.js installer from the official website https://nodejs.org/. Click on either the LTS or Current versions and the installer will start downloading.
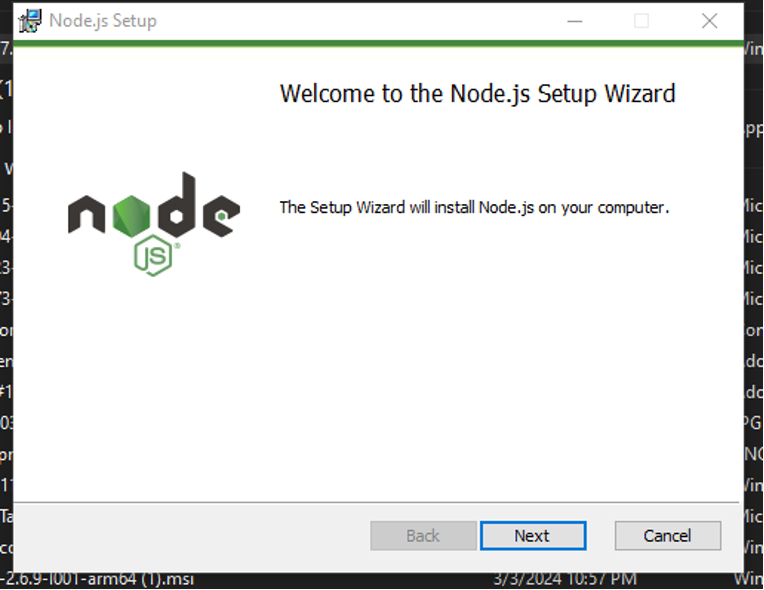
After download is complete, double-click on the downloaded file to run the installer.
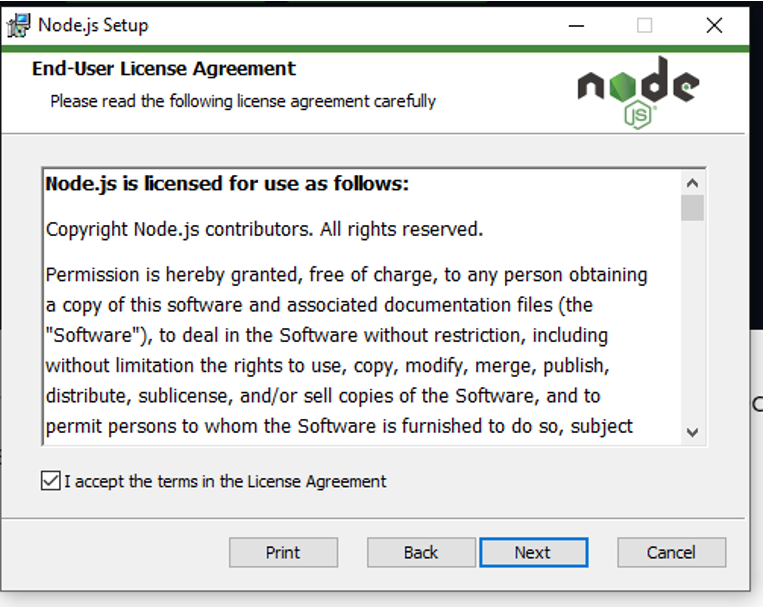
Tick on the “I accept the terms License Agreement” then click “Next”.
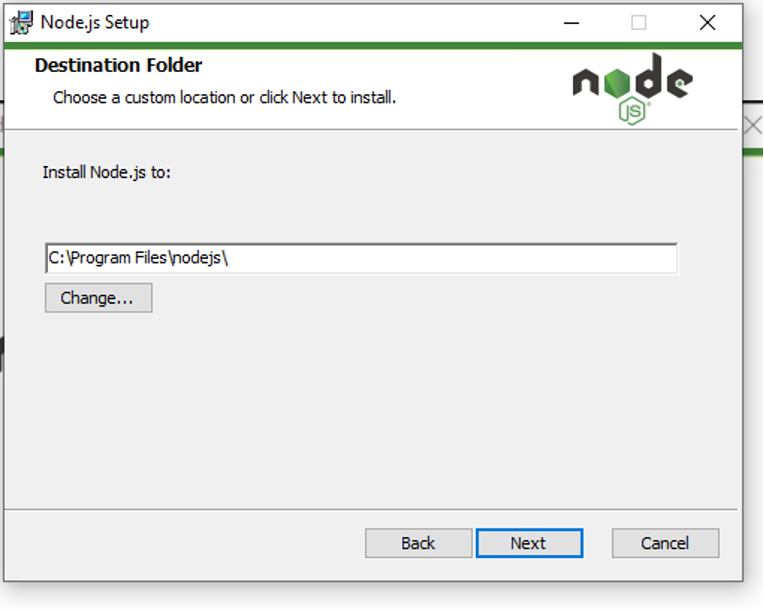
You may choose your preferred installation location by clicking on the “Change” button. You may also install it in the default directory in your Program Files. Click “Next” to continue.
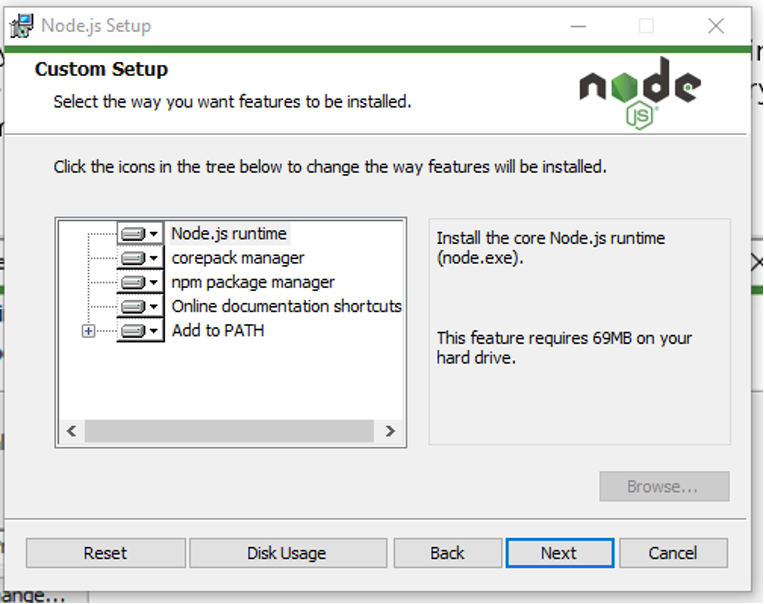
Keep the default settings in the Custom Setup page then click “Next”.
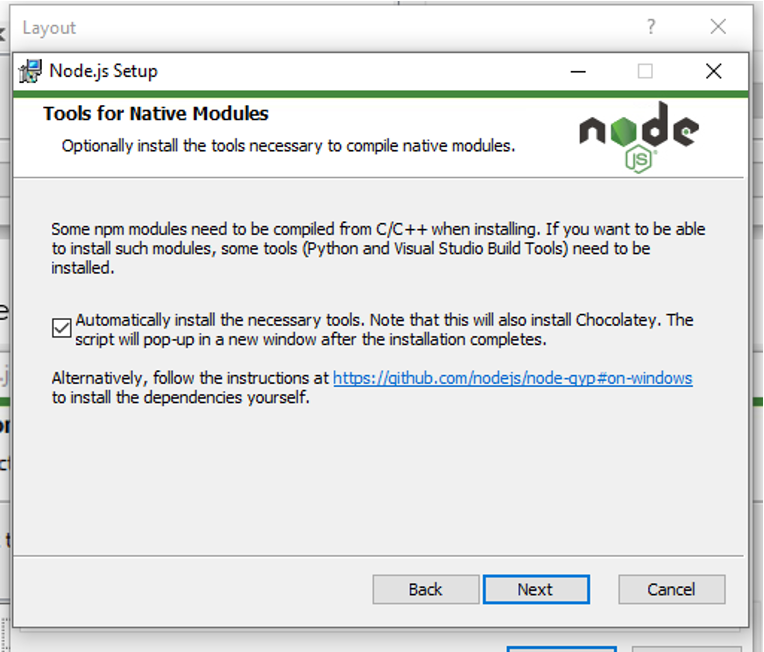
Tick the tick box as shown in the screenshot below and click “Next”.
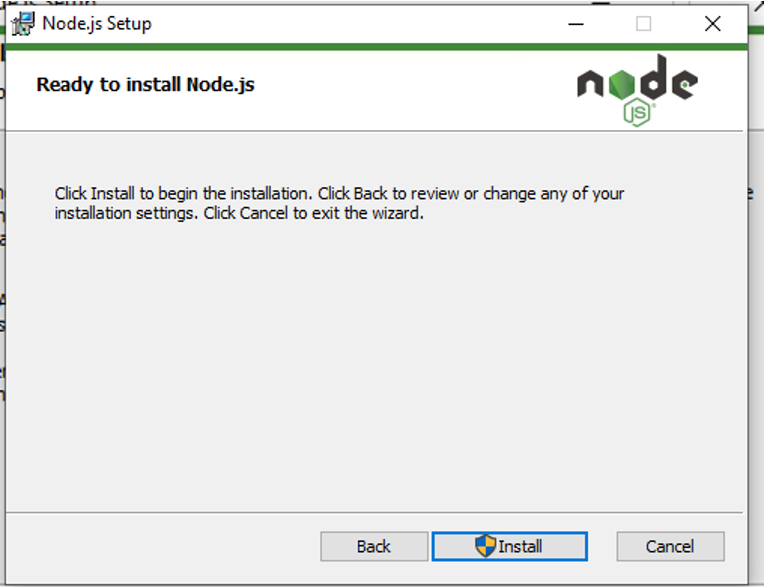
Click “Install” to continue with the installation.
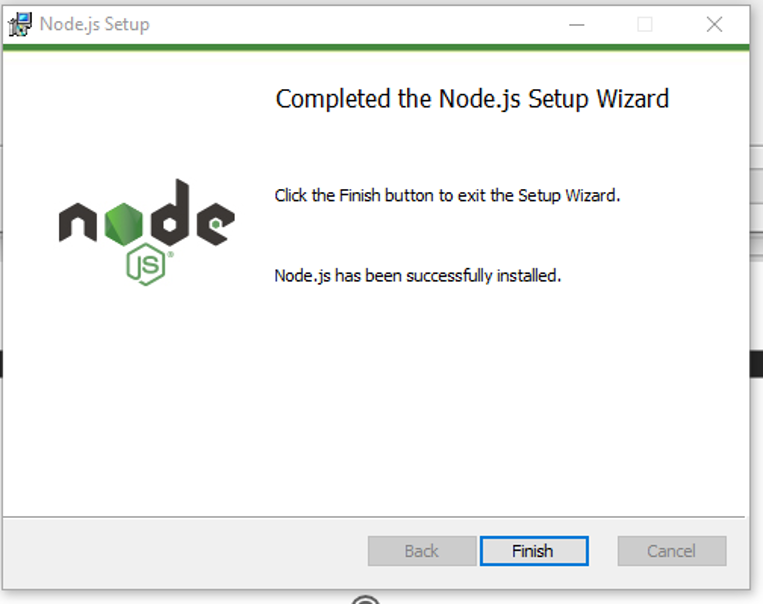
Once the installation is done, Click “Finish”
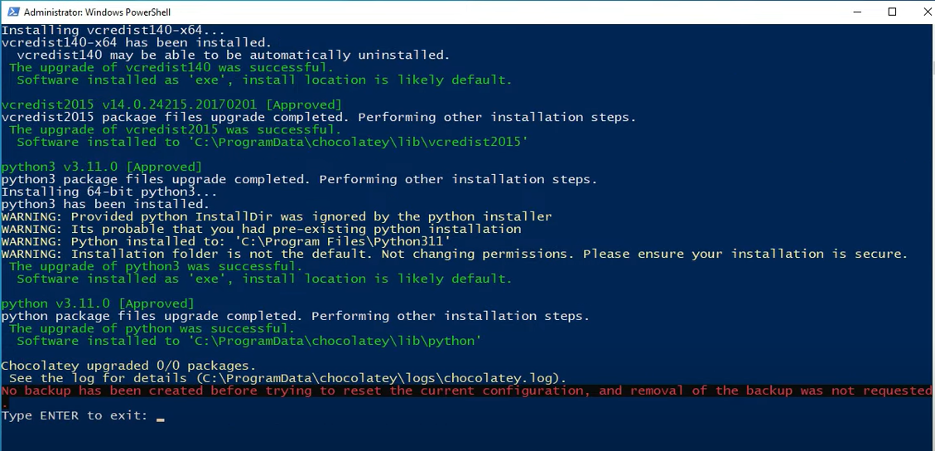
“Install Additional Tools for Node.js” window will show. Just press any key to proceed.
The Windows PowerShell will pop-up on the screen to show installation status of additional tools. Type “ENTER” once completed to exit the window.
Confirm if NPM and Node.js were successfully installed
Verify installation of Node.js and NPM by typing the commands below in the Command Prompt. Command Prompt will show the version of your Node.js and NPM
node -v
npm -v
You can also verify the installation from Windows PowerShell by typing the same command.
node -v
npm -v
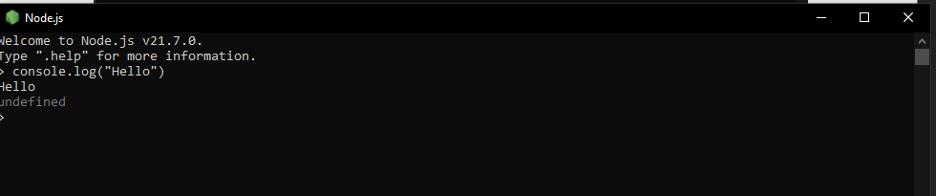
Test your Node.js by opening it and typing any command related to node.js
Initialize a project using NPM
To create a Node.js project, run the `npm init` command. This command will walk you through in creating a `package.json` file.
Follow the command prompts to create the `package.json` file. This file will contain the important details of the project.
Install modules using NPM
To install modules in your Node.js project, use the command `npm install <enter module name>`.
Example: To install module such as Express, use the command `npm install express`
NPM will download and install the module you specified and its dependencies into the project `node_modules` directory.
Note: If you want all of your applications to use a specified module, install the module globally using `–global` flag so that all Node.js applications in your system can use it. Command: `npm install <enter module name you want to install globally> — global`.
Manage NPM packages
The packages or modules you installed in your project can be managed using the NPM commands. Here are some of the essential commands that can help you manage your project:
`npm uninstall <enter package name>` – used to uninstall a package
`npm list -g –depth=0` – List globally installed packages
`npm -g uninstall <name>`- used to uninstall a global package
`npm-windows-upgrade`- Upgrade npm on Windows
`npm run`- list available scripts to run
`npm install <package-name> –save-dev` – install package as a development dependency.
`npm update` -update all packages to their latest versions based on the version constraints specified in package.json.
`npm start`- start your Node.js application (if configured in package.json under “scripts”).