Learn how to install FFmpeg on Windows with our complete tutorial. Master the procedures for swiftly installing this powerful multimedia framework and unlocking a world of multimedia processing capabilities on your Windows system. Begin utilizing FFmpeg’s capabilities immediately!
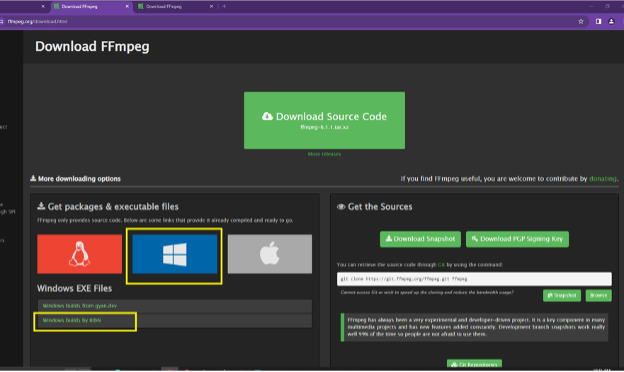
Navigate to the Windows EXE Files and click the “Windows builds by Btbn”.
Select the Windows build that matches your system architecture (32-bit or 64-bit
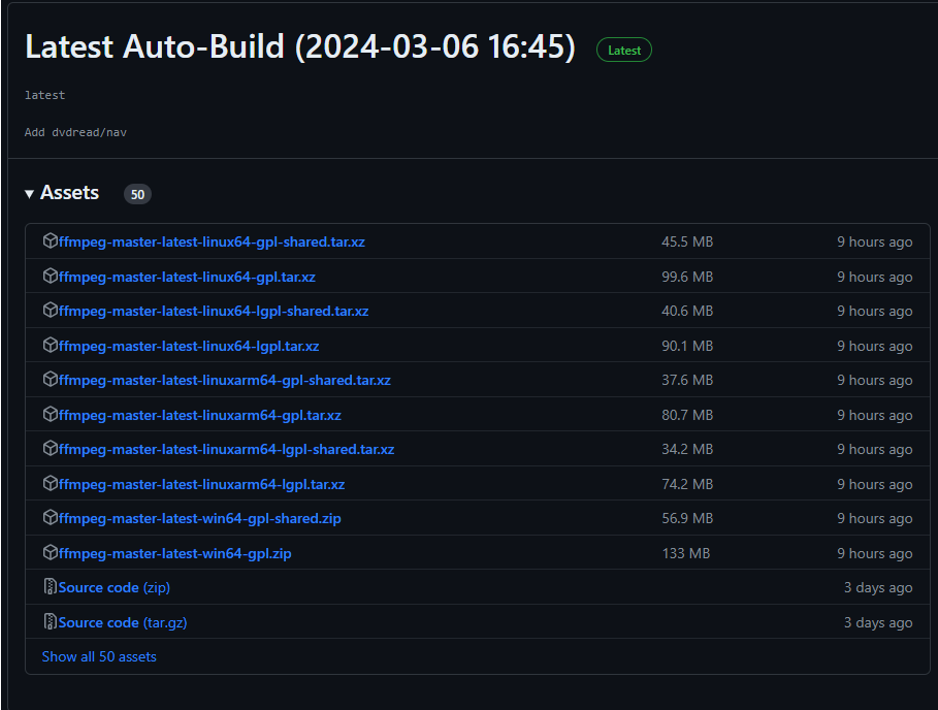
When download is done, open the content of the downloaded zip file. Go to “Bin” folder and extract the FFmpeg exe to a folder on your computer.
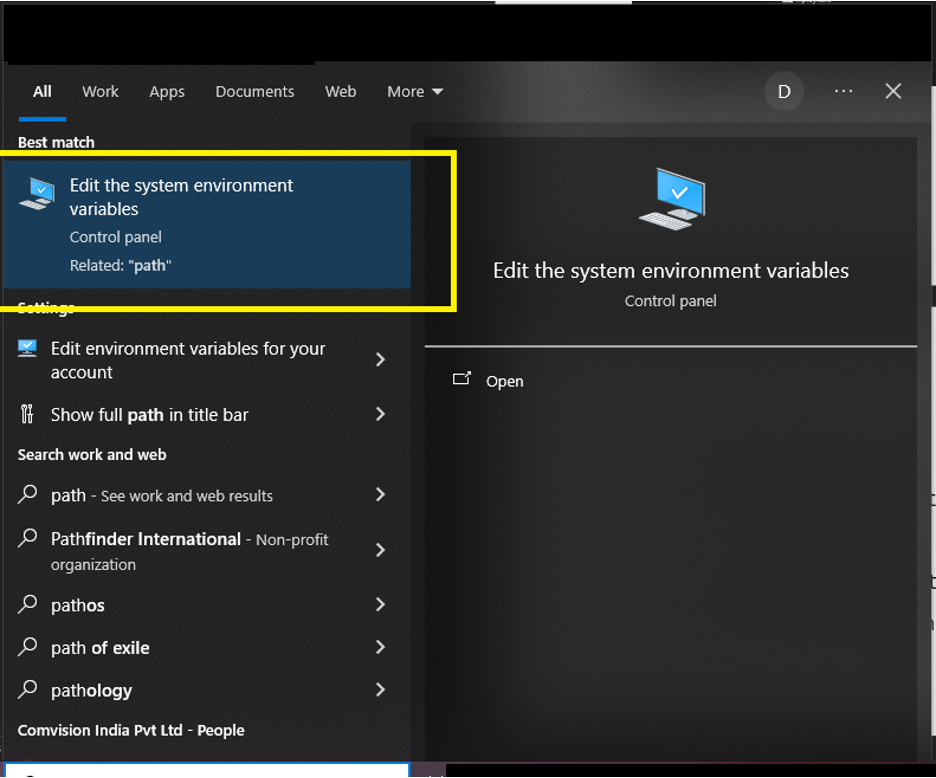
Copy the path of the directory where you extracted the FFmpeg exe and add it to the system’s PATH environment variable.
To add the FFmpeg to the System Path, go to “Start”, type in `PATH` then click on “Edit the System edit environment variable”
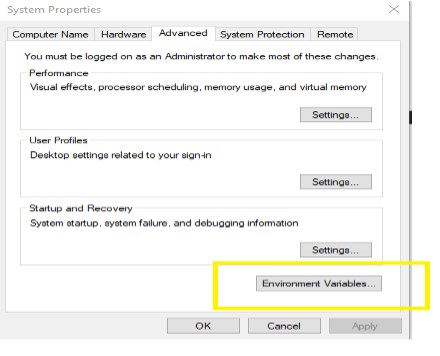
Click on the “Environment Variables” button
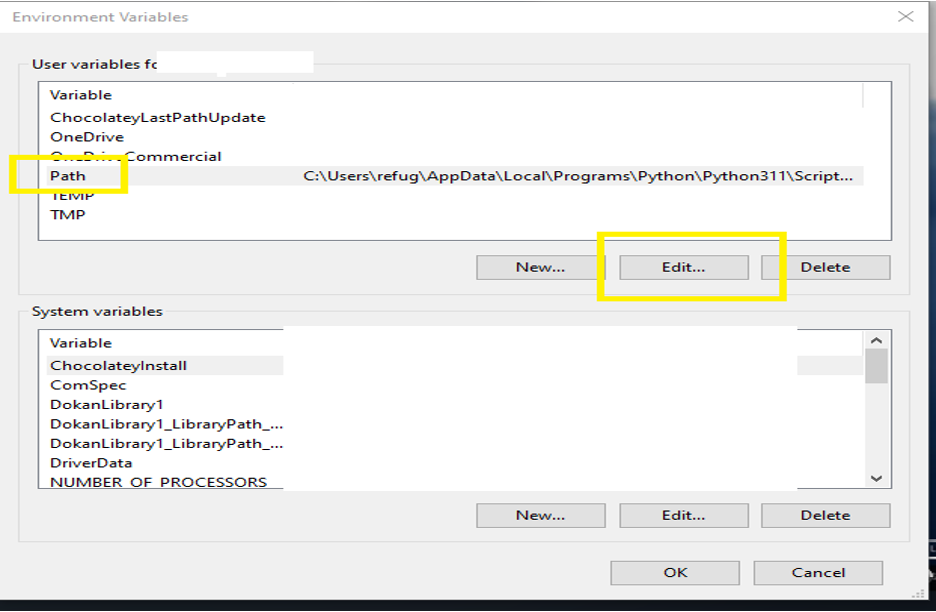
Under user variables, navigate to Path then click “Edit”
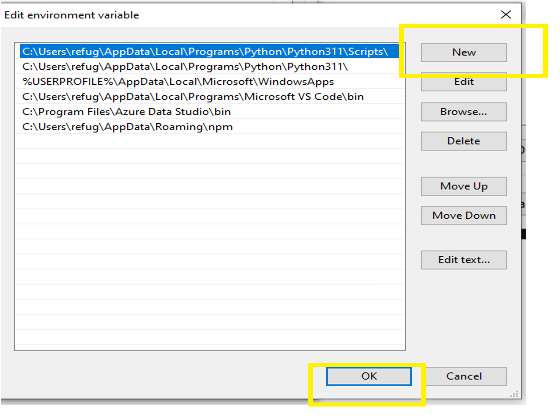
Click “New” and add the FFmpeg path then click “OK” to save changes.
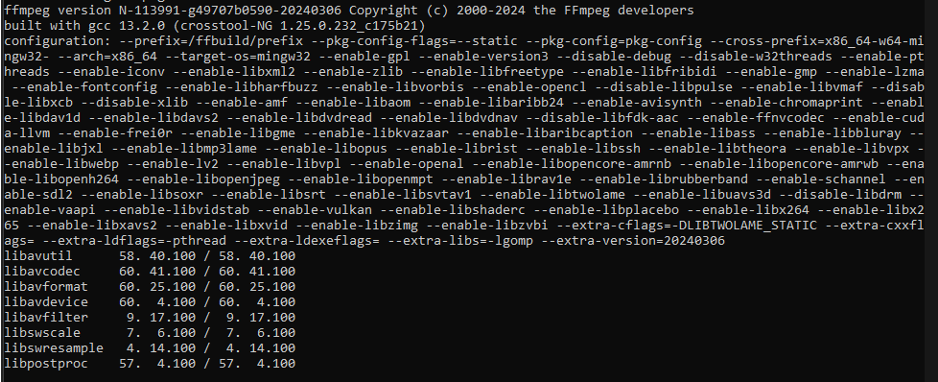
Verify if installation is successful by going to Command Prompt and type `ffmpeg -version`. If the installation is successful, the version information should be displayed.